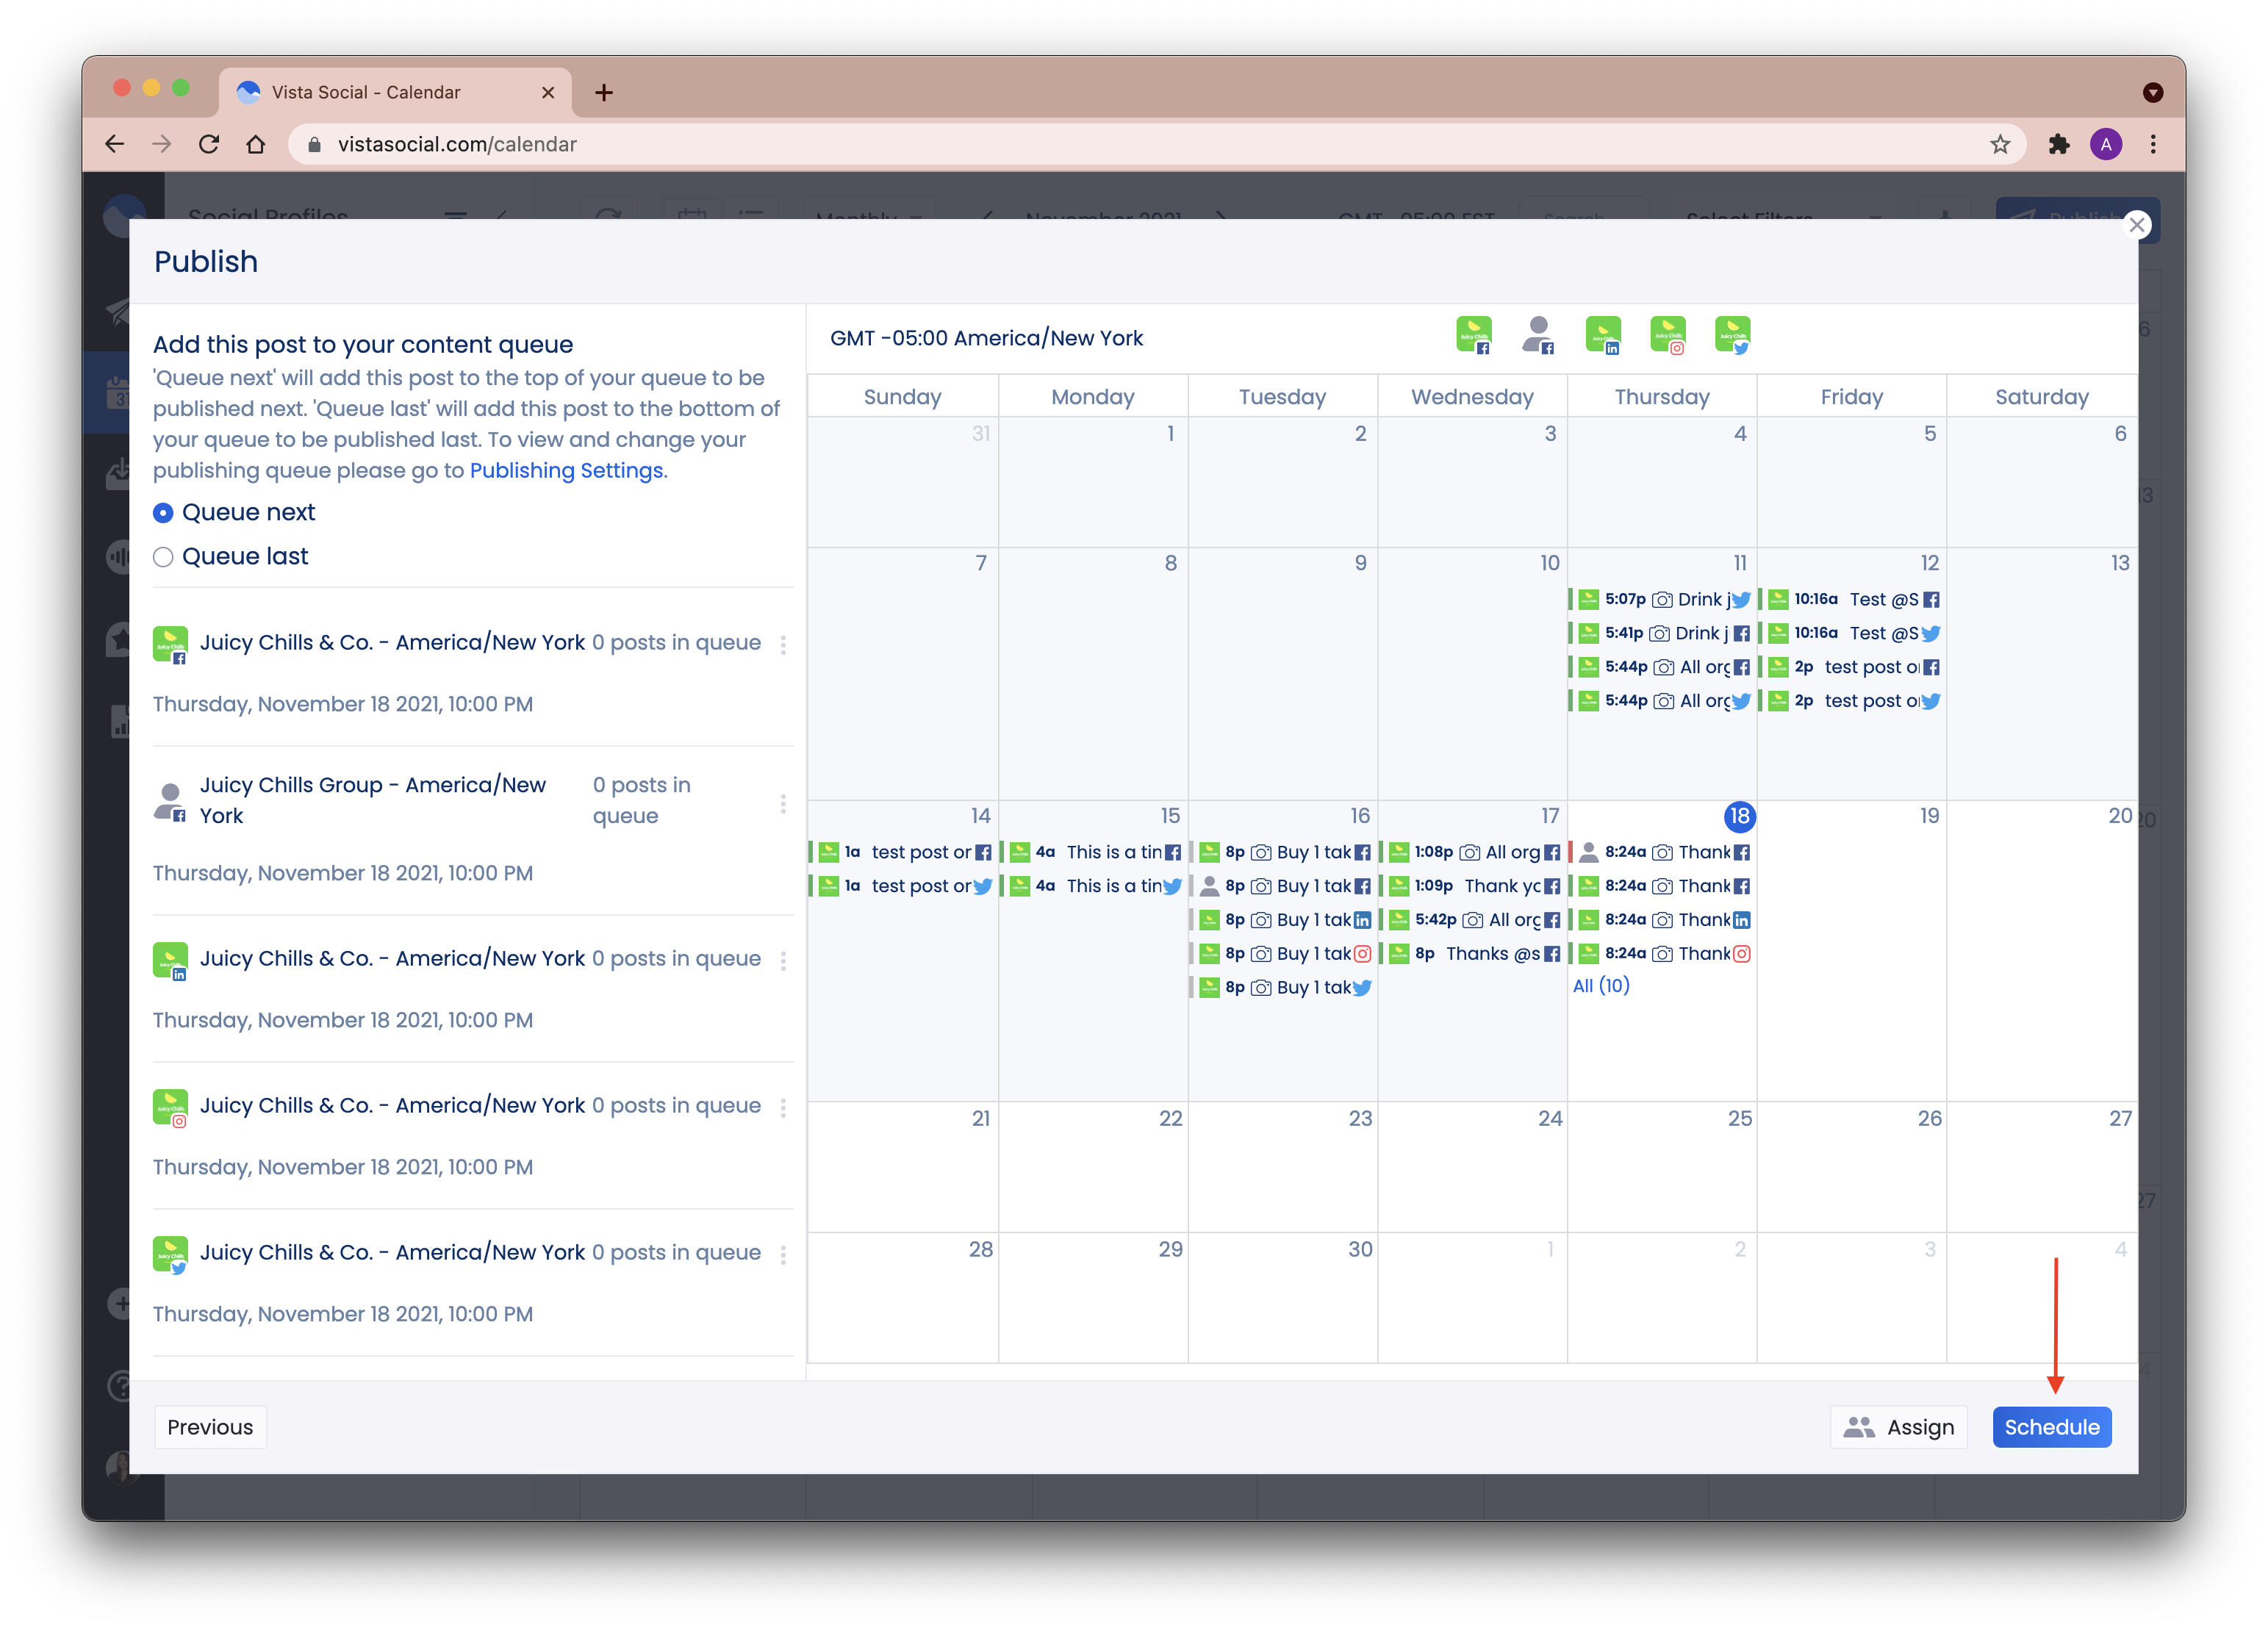
How do I schedule posts for multiple social channels at the same time?
Vista Social allows you to easily schedule posts for multiple social media profiles in one go -- not only that, you can even customize how you want each post would look not just by network but also by actual social profile!
This article provides a step-by-step guide on how to schedule posts for multiple social networks and how to customize them by network and by social profile.
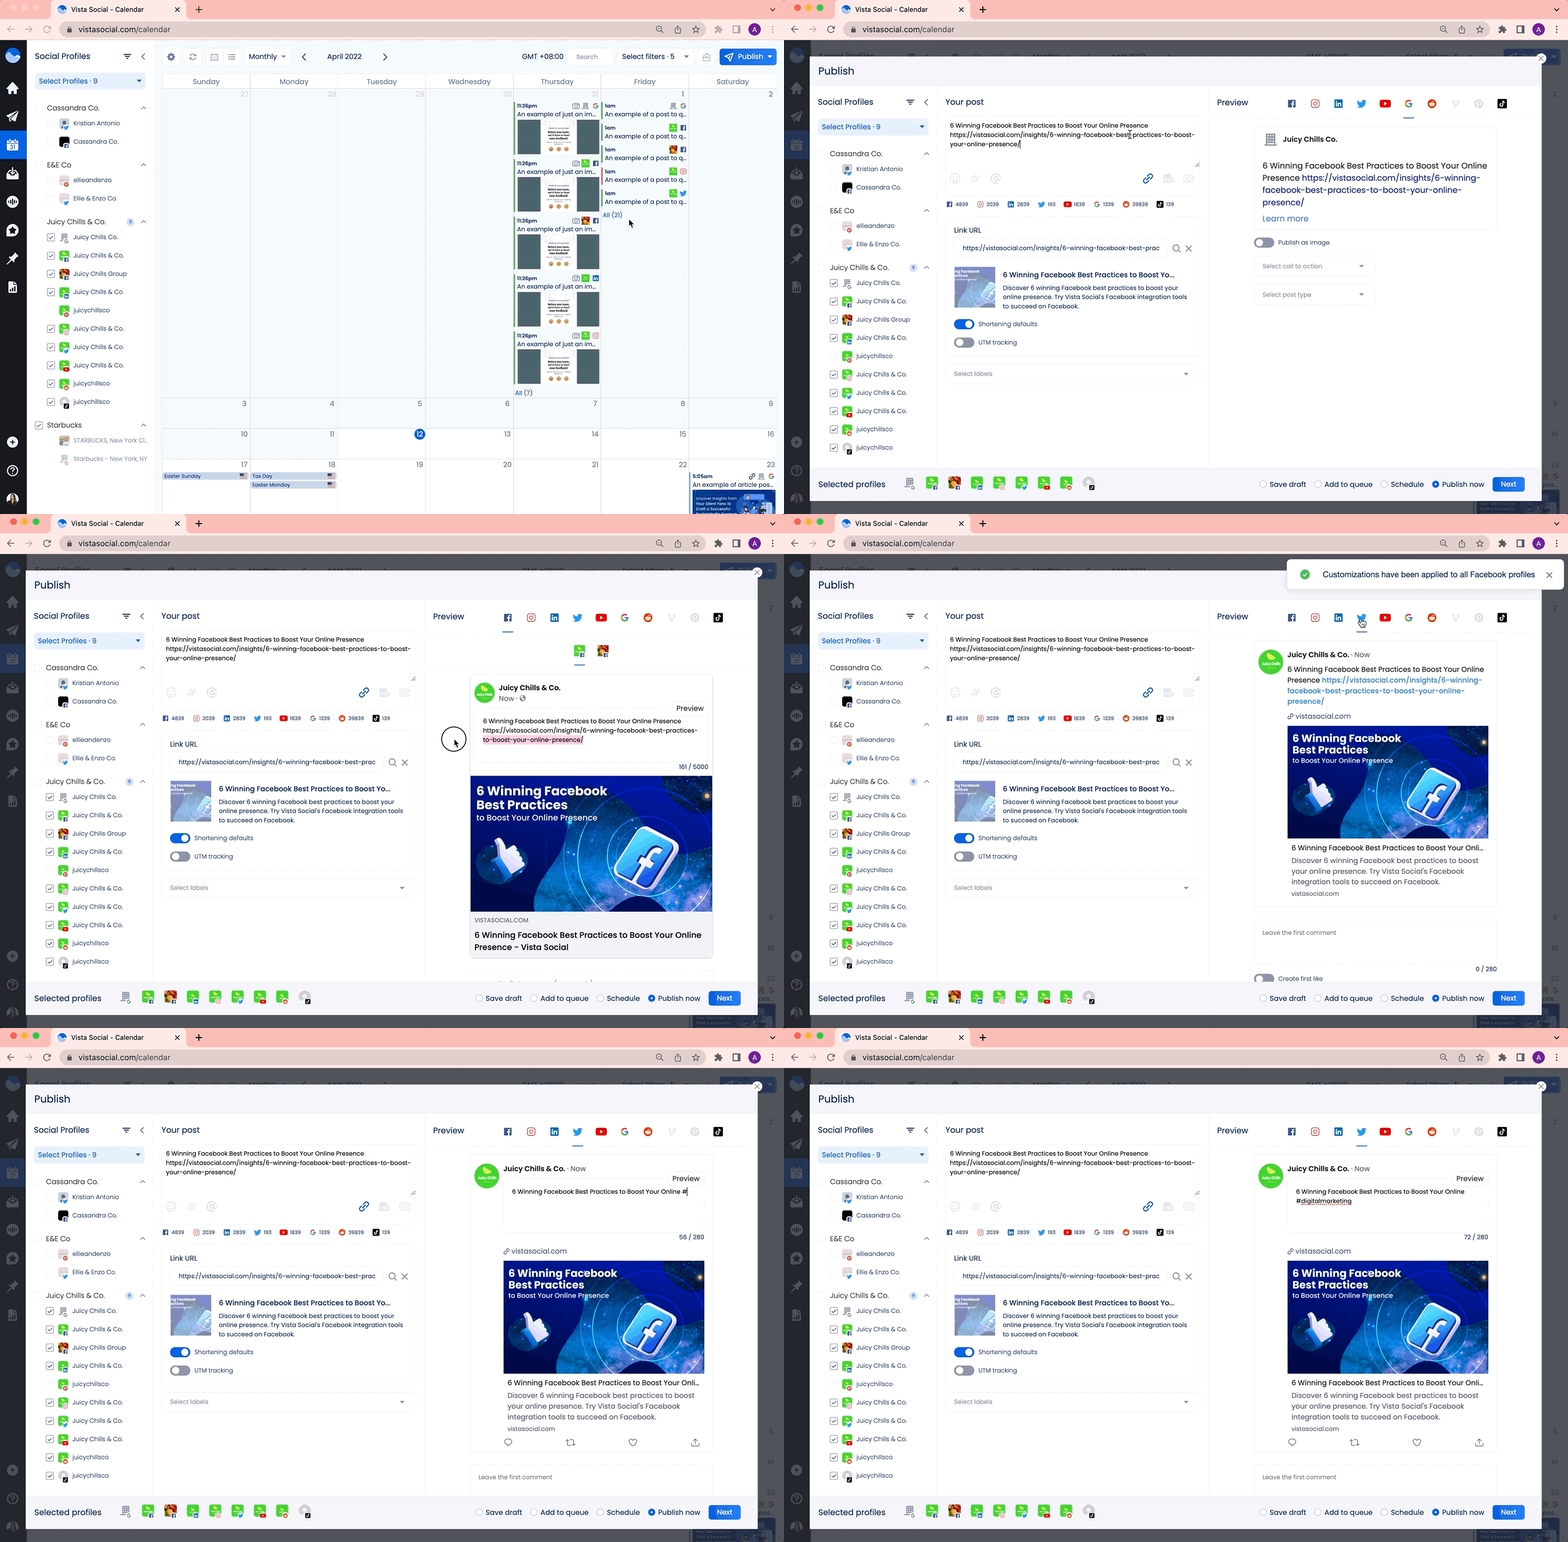
How to schedule a post for multiple profiles
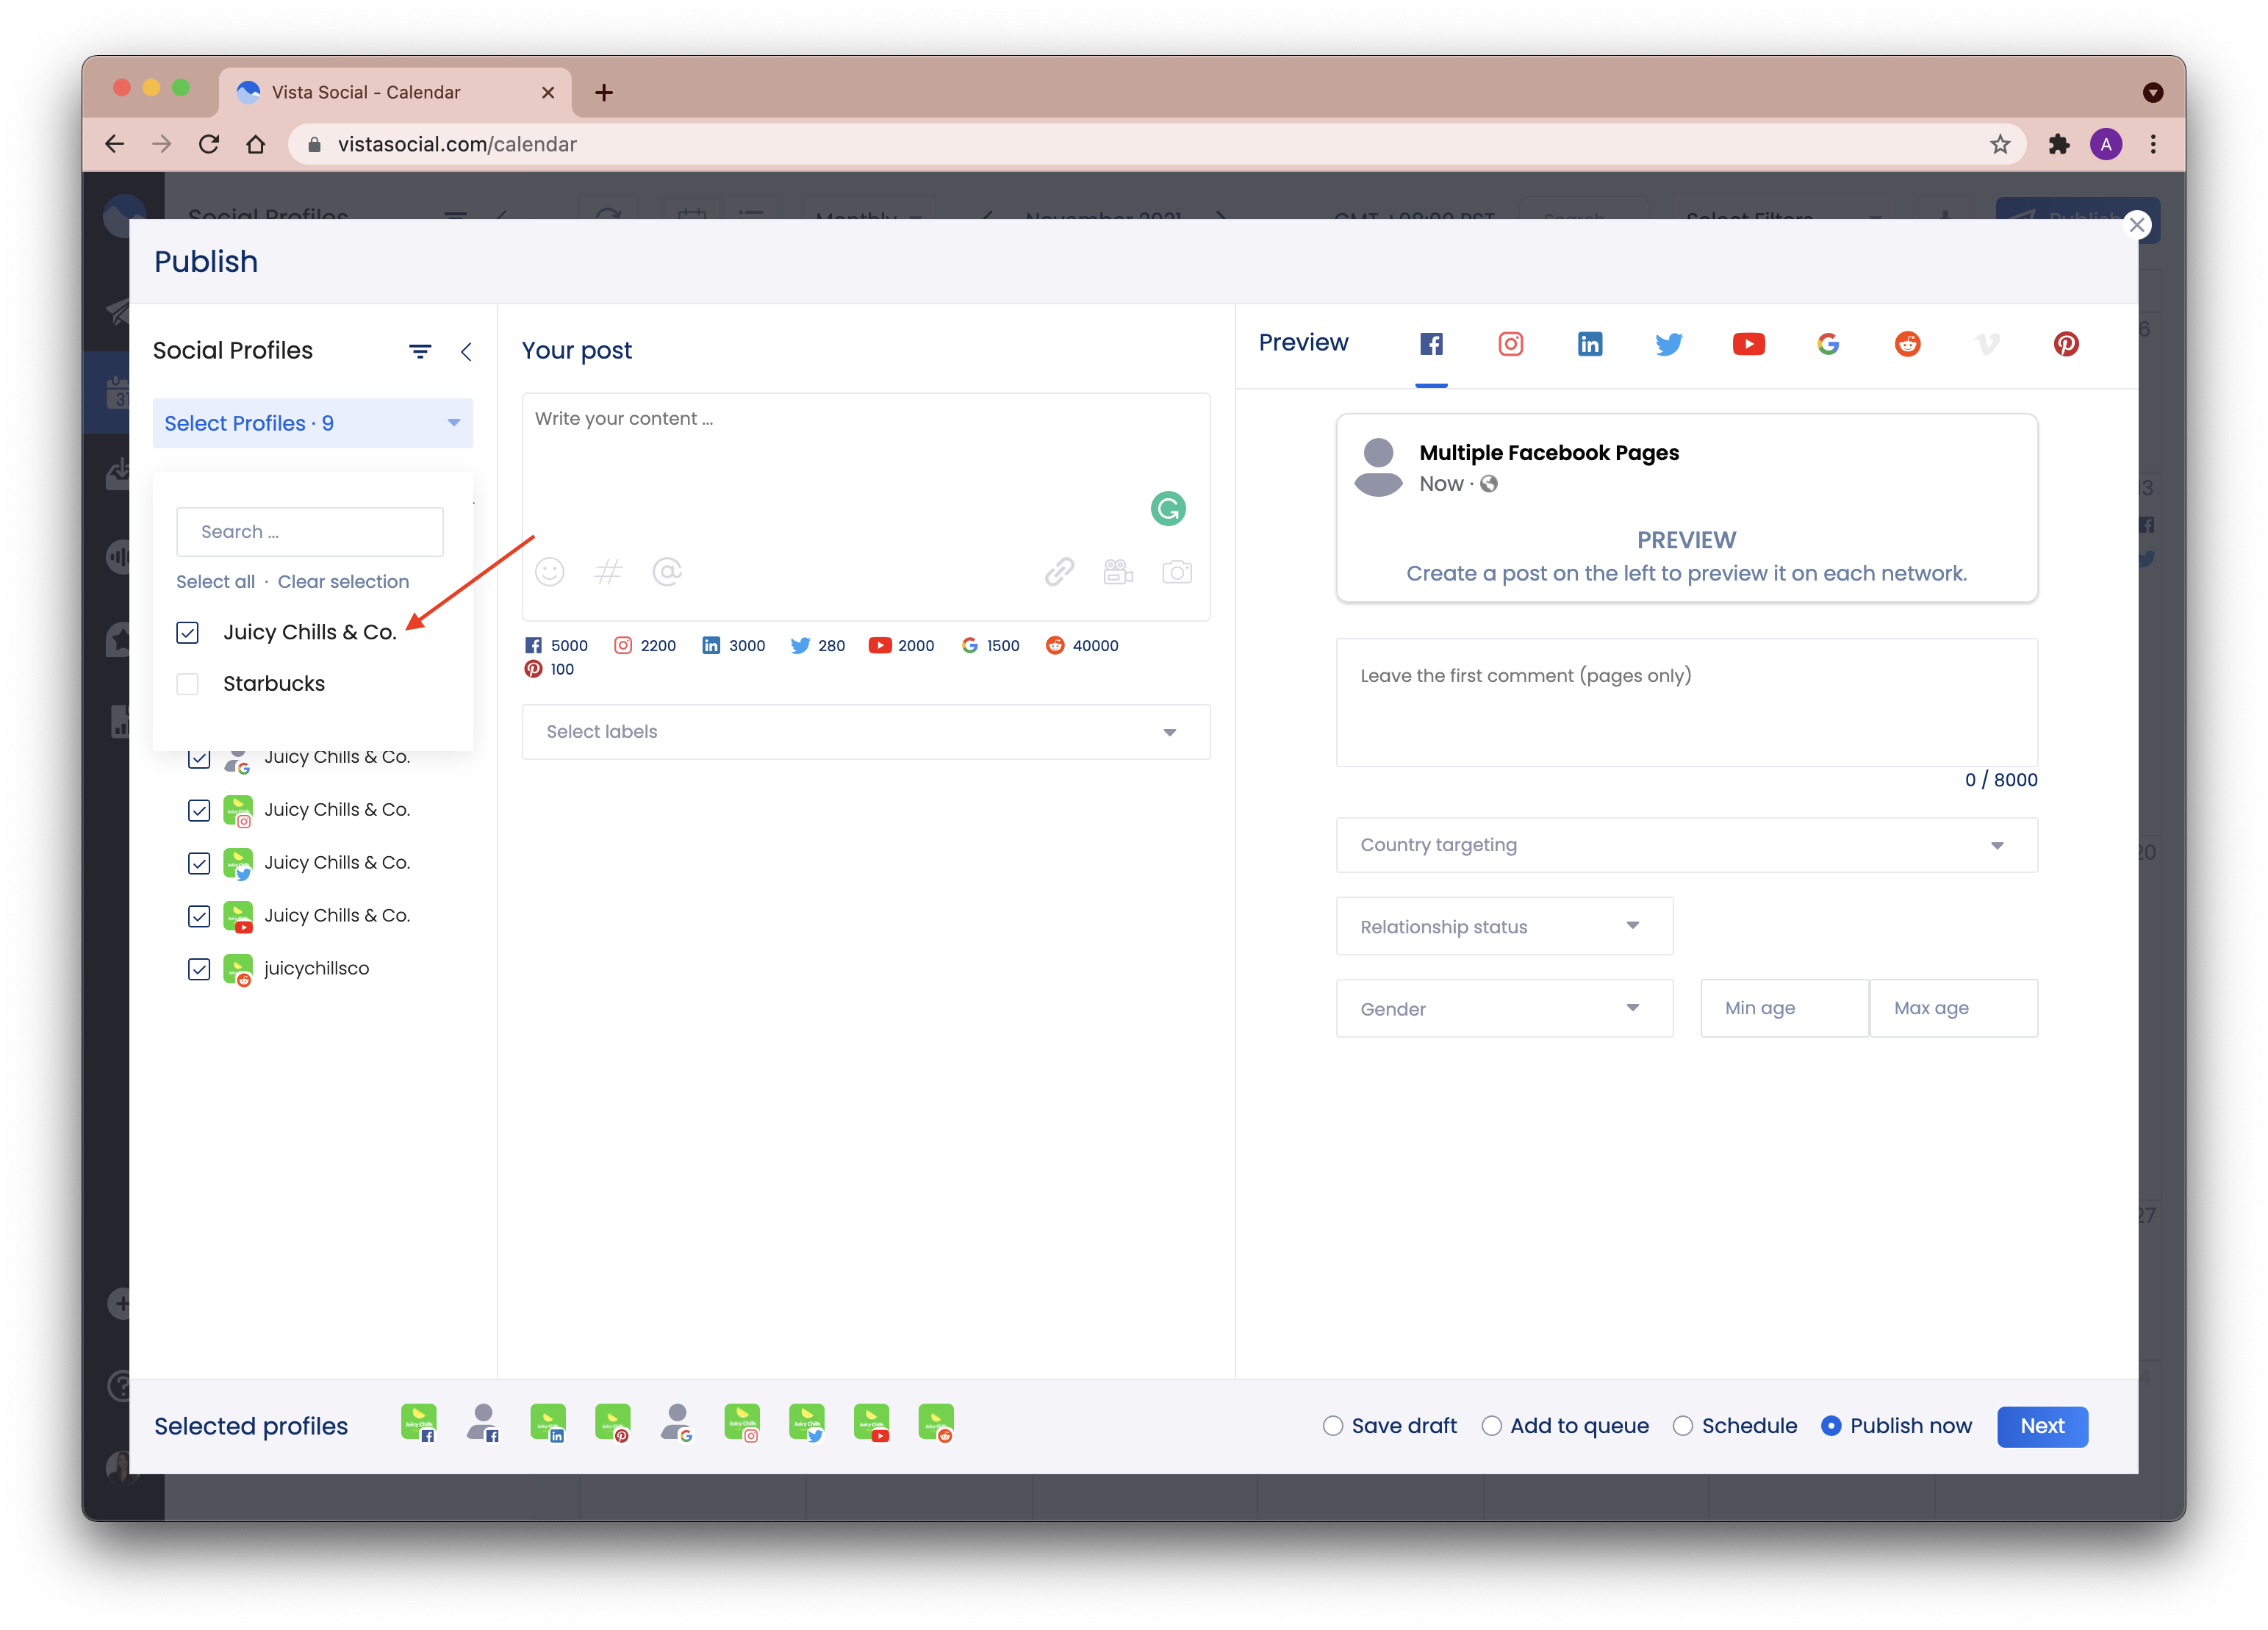
1. On your Vista Social account, go to Publish to open the publishing window.
2. Click Select Profiles and select the Profile Group that you want to post to. All networks for the profile group you chose will be automatically selected. You may also deselect certain profiles if you want to post to certain networks only.
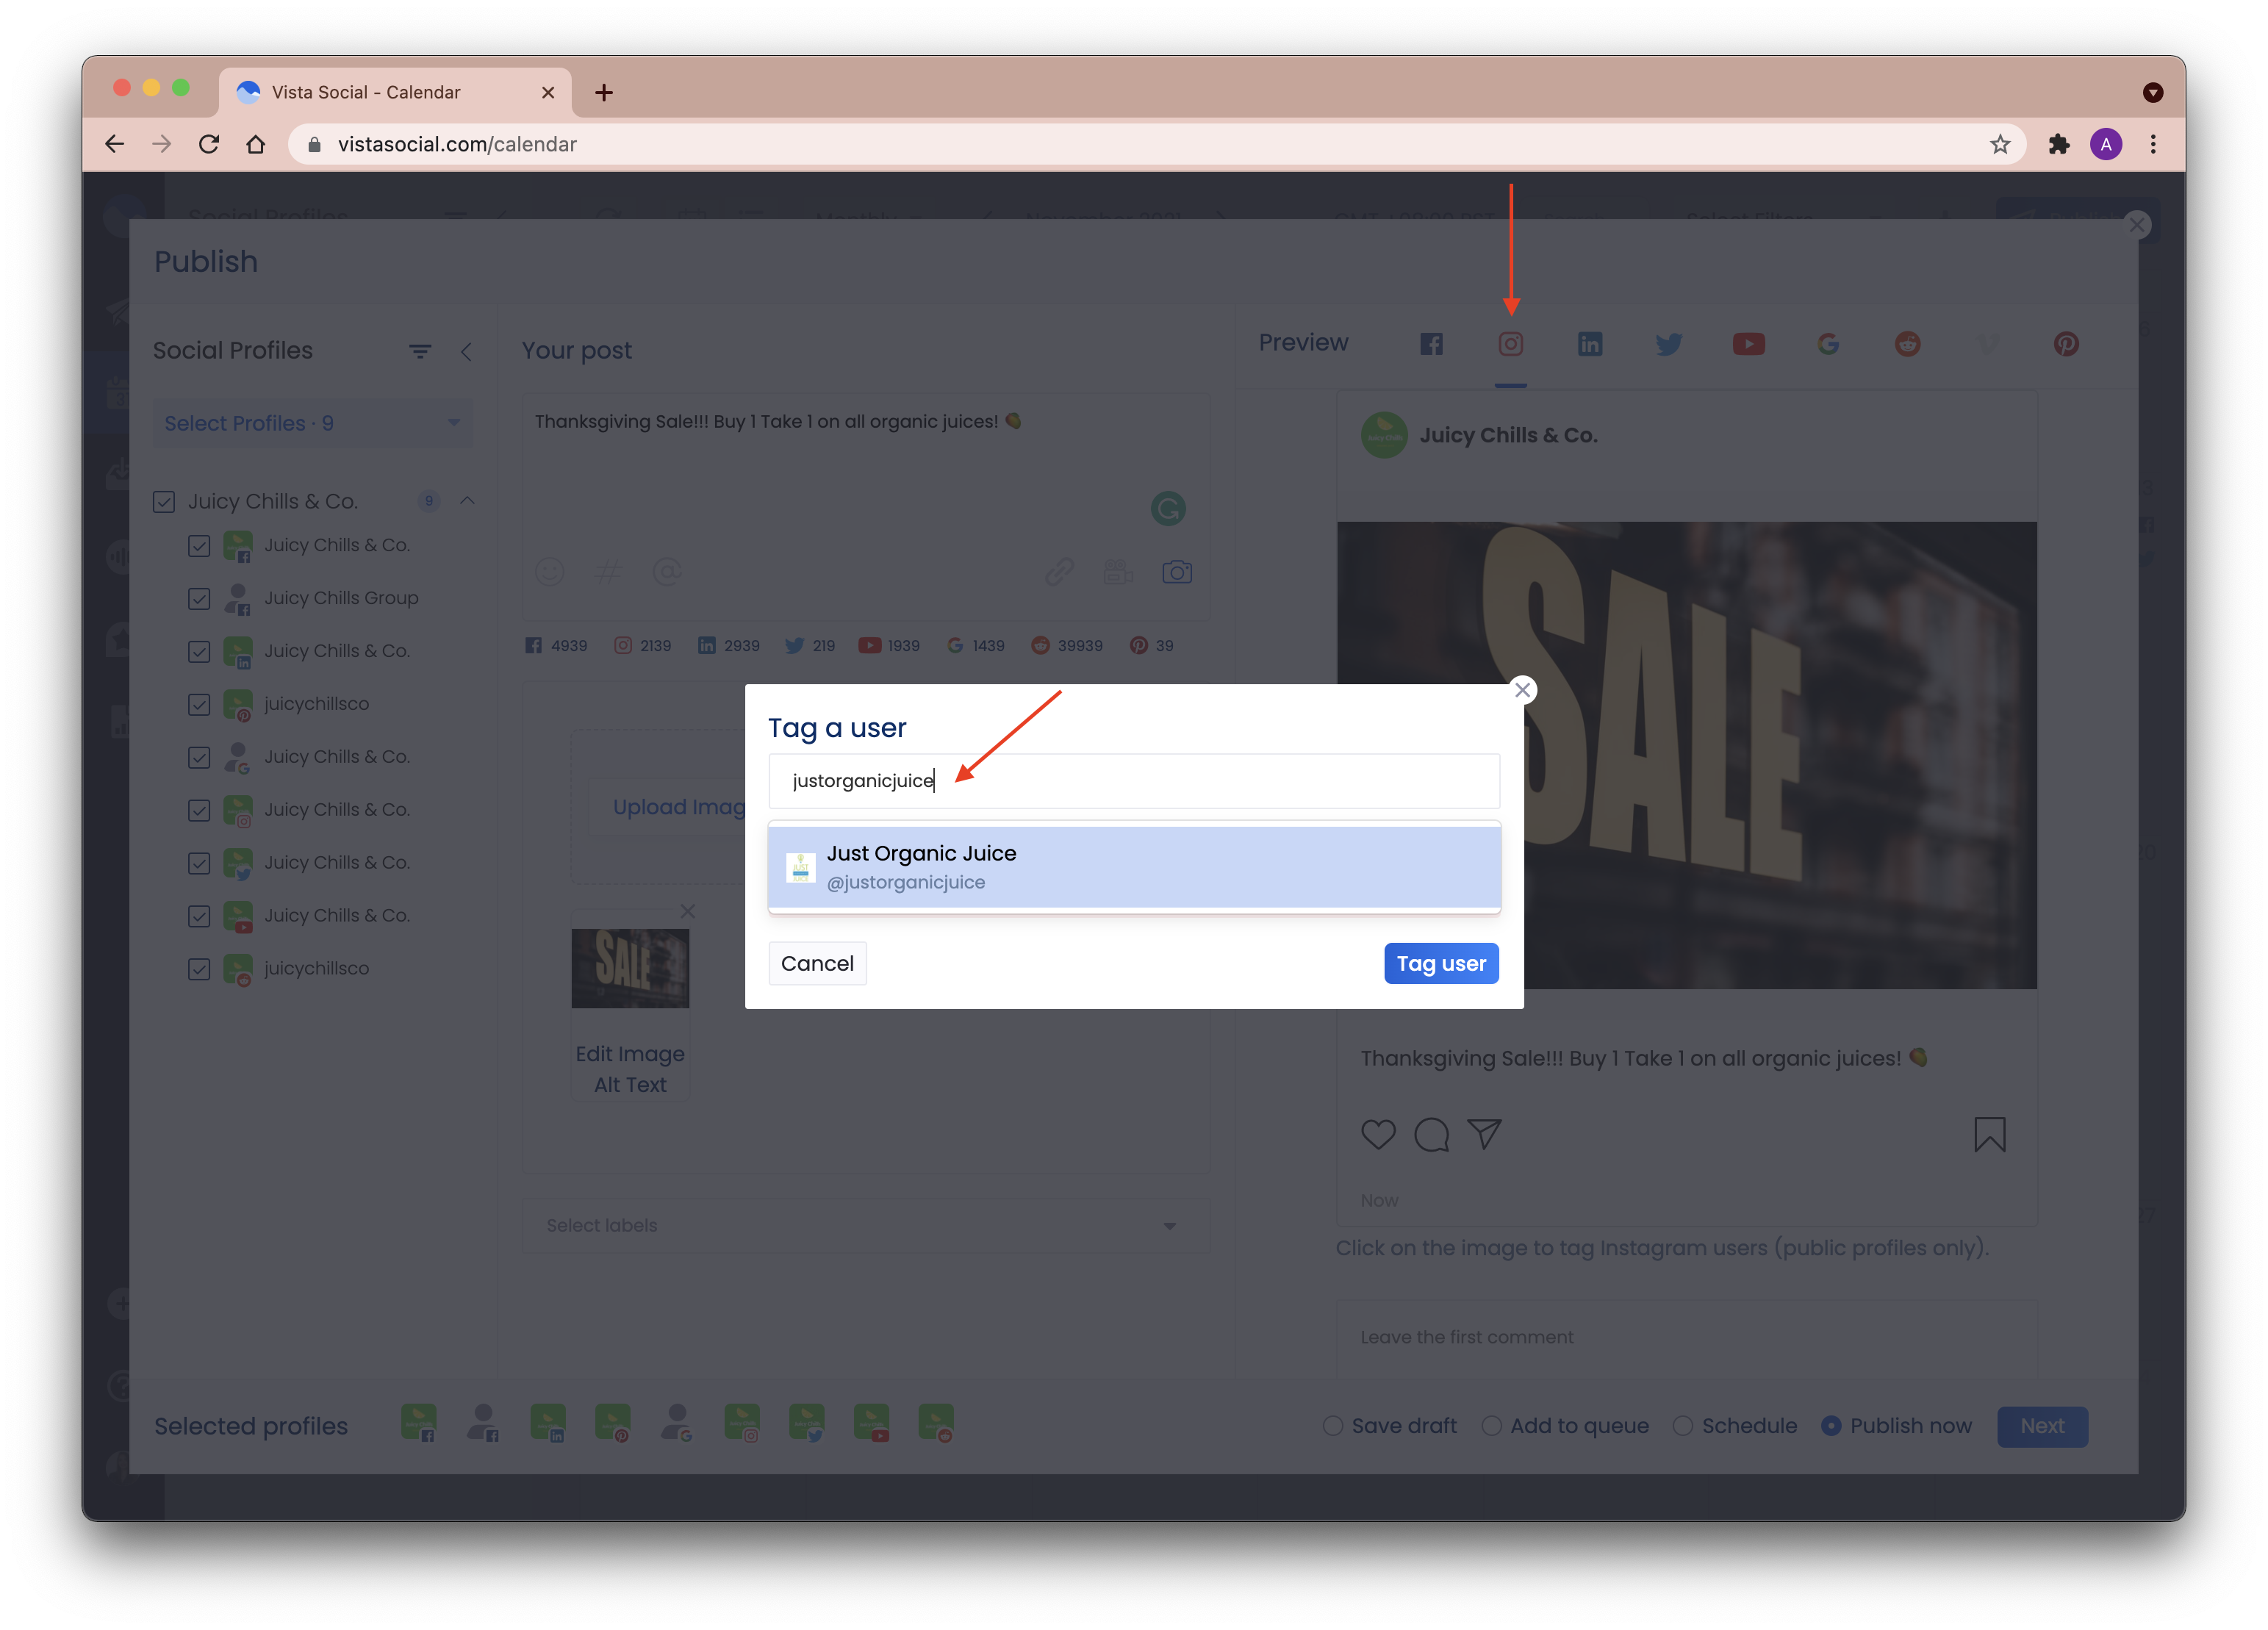
3. Create your post. The post preview appears on the right side and you may toggle in between profiles to check how the post would look per network. More actions are available depending on the network which you can add as you schedule the post. For example, with Instagram, you can tag a user by simply clicking on the image:
Post Preview Customization - you may customize your text in the post preview both by social profile and by network. If you want to customize the text just for one profile, simply click on the text post in the preview screen to modify the content. Click Preview once done. 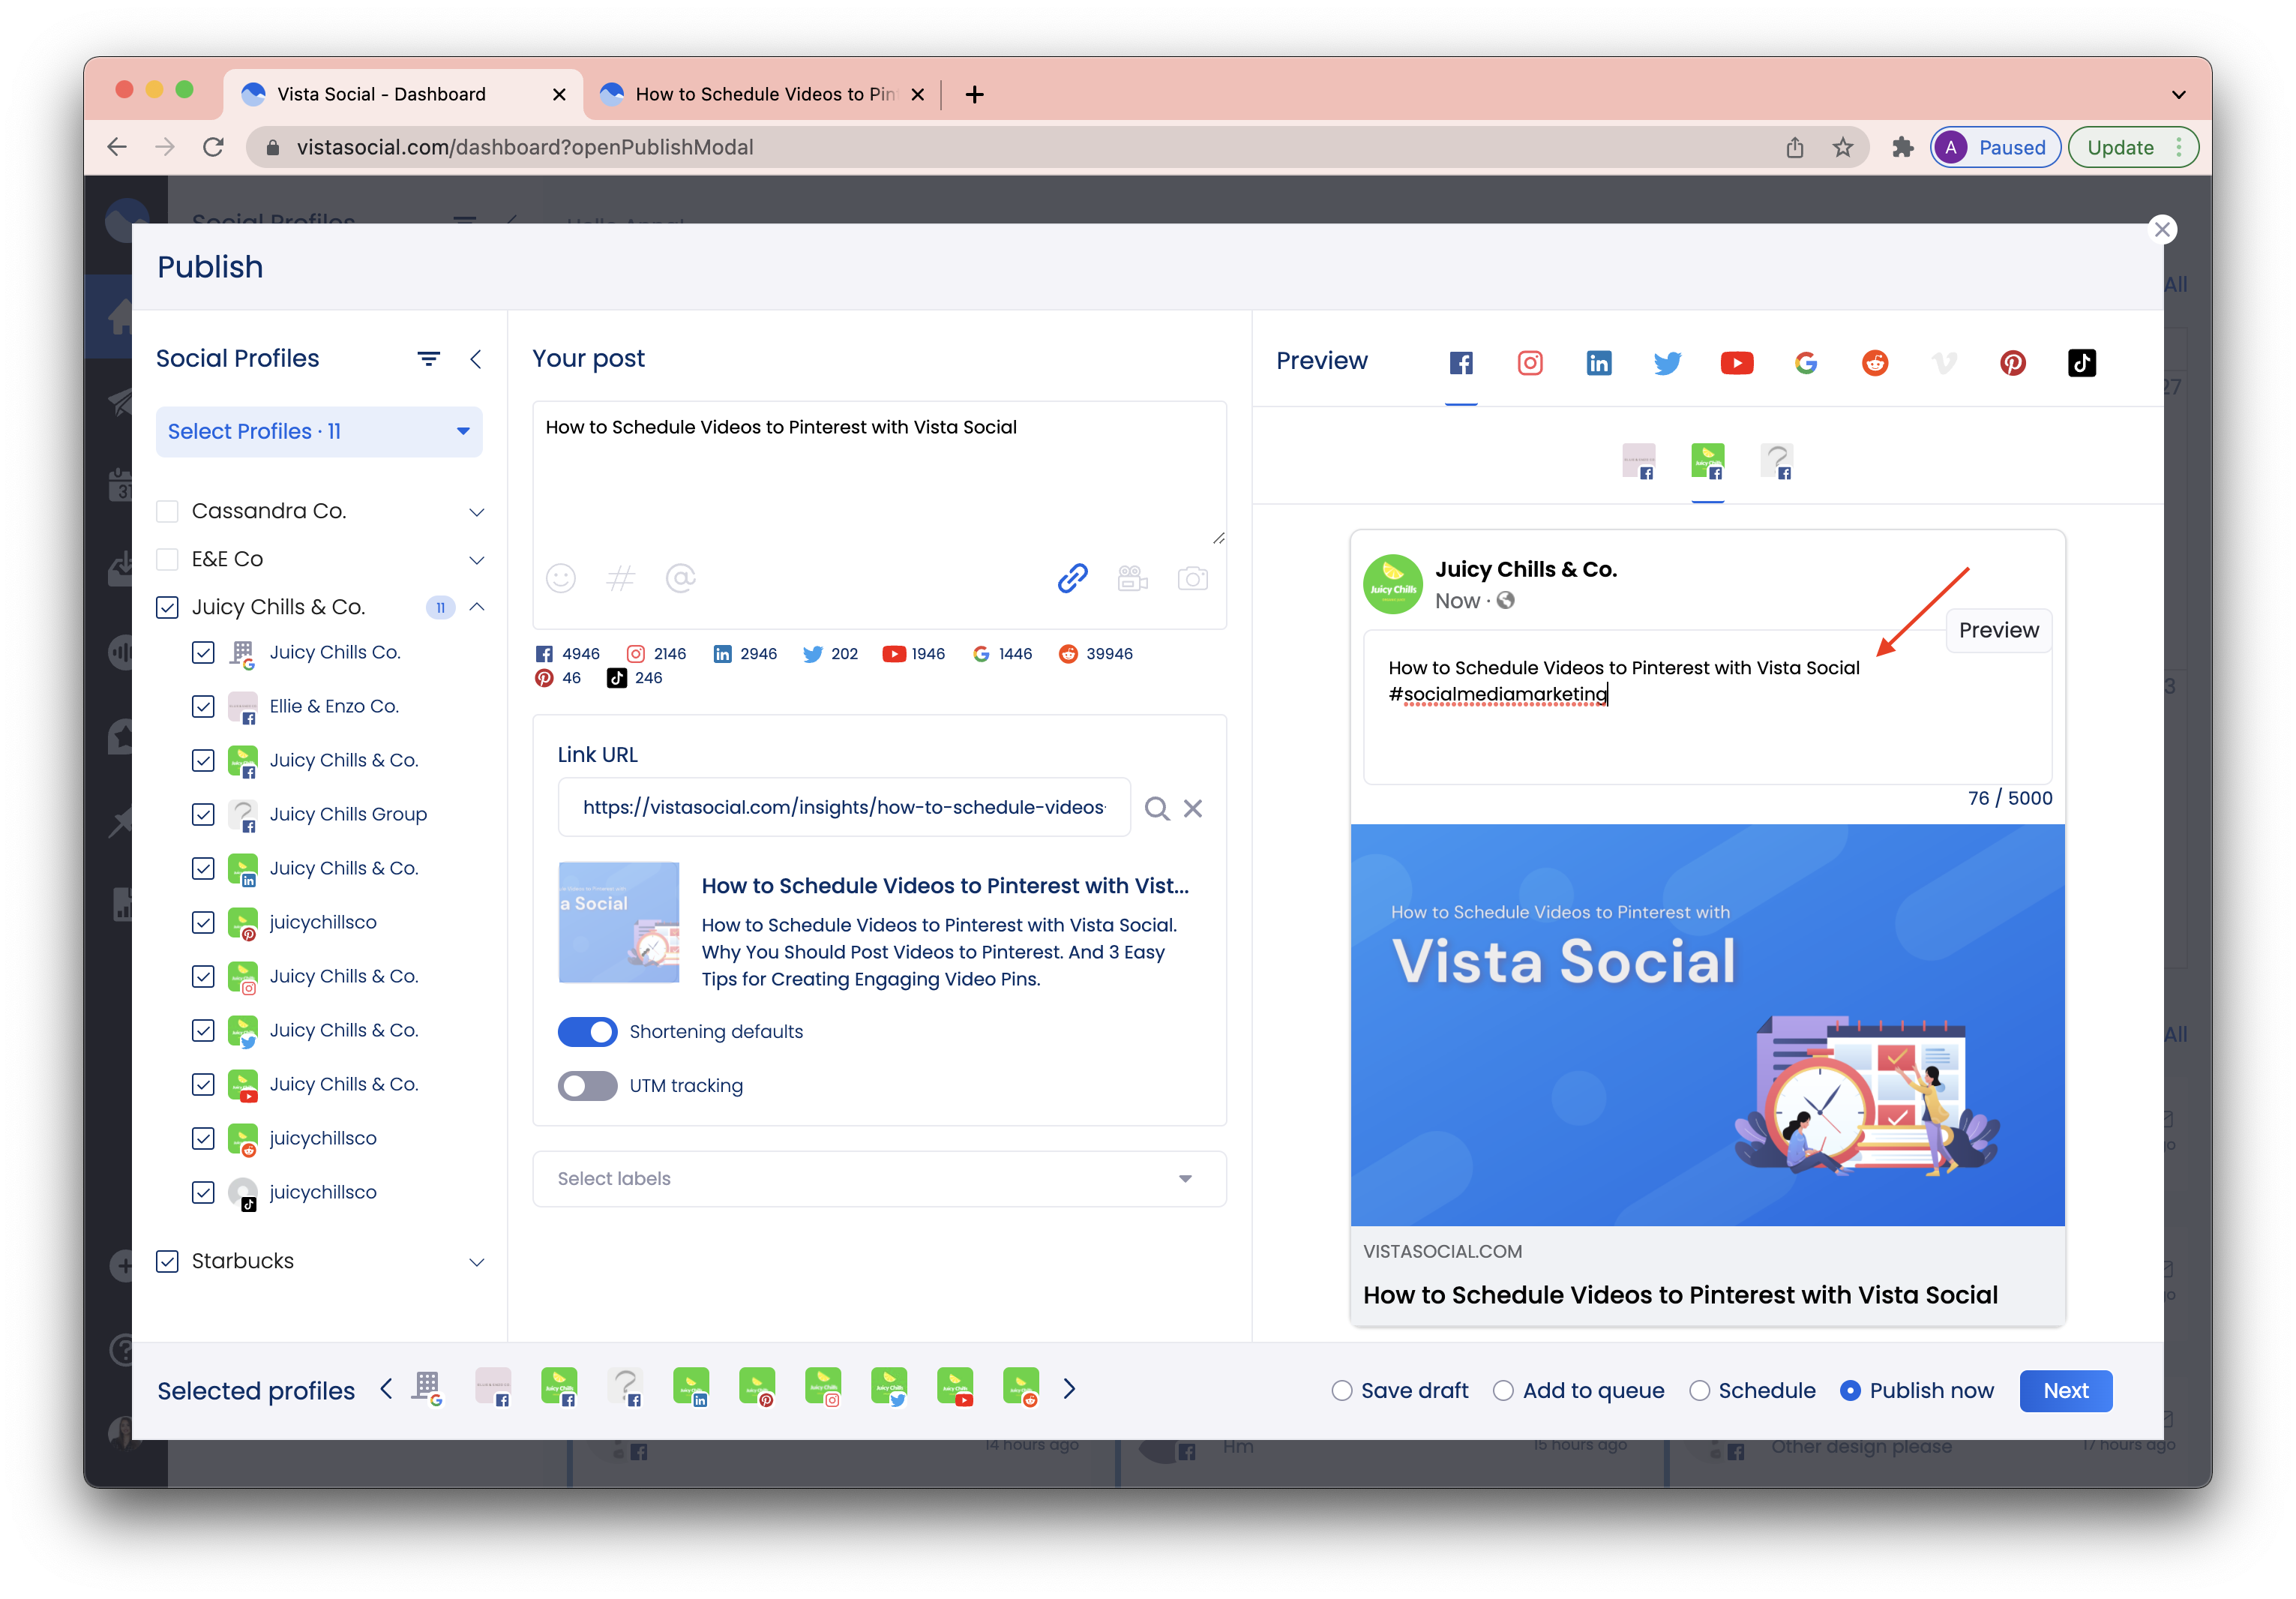
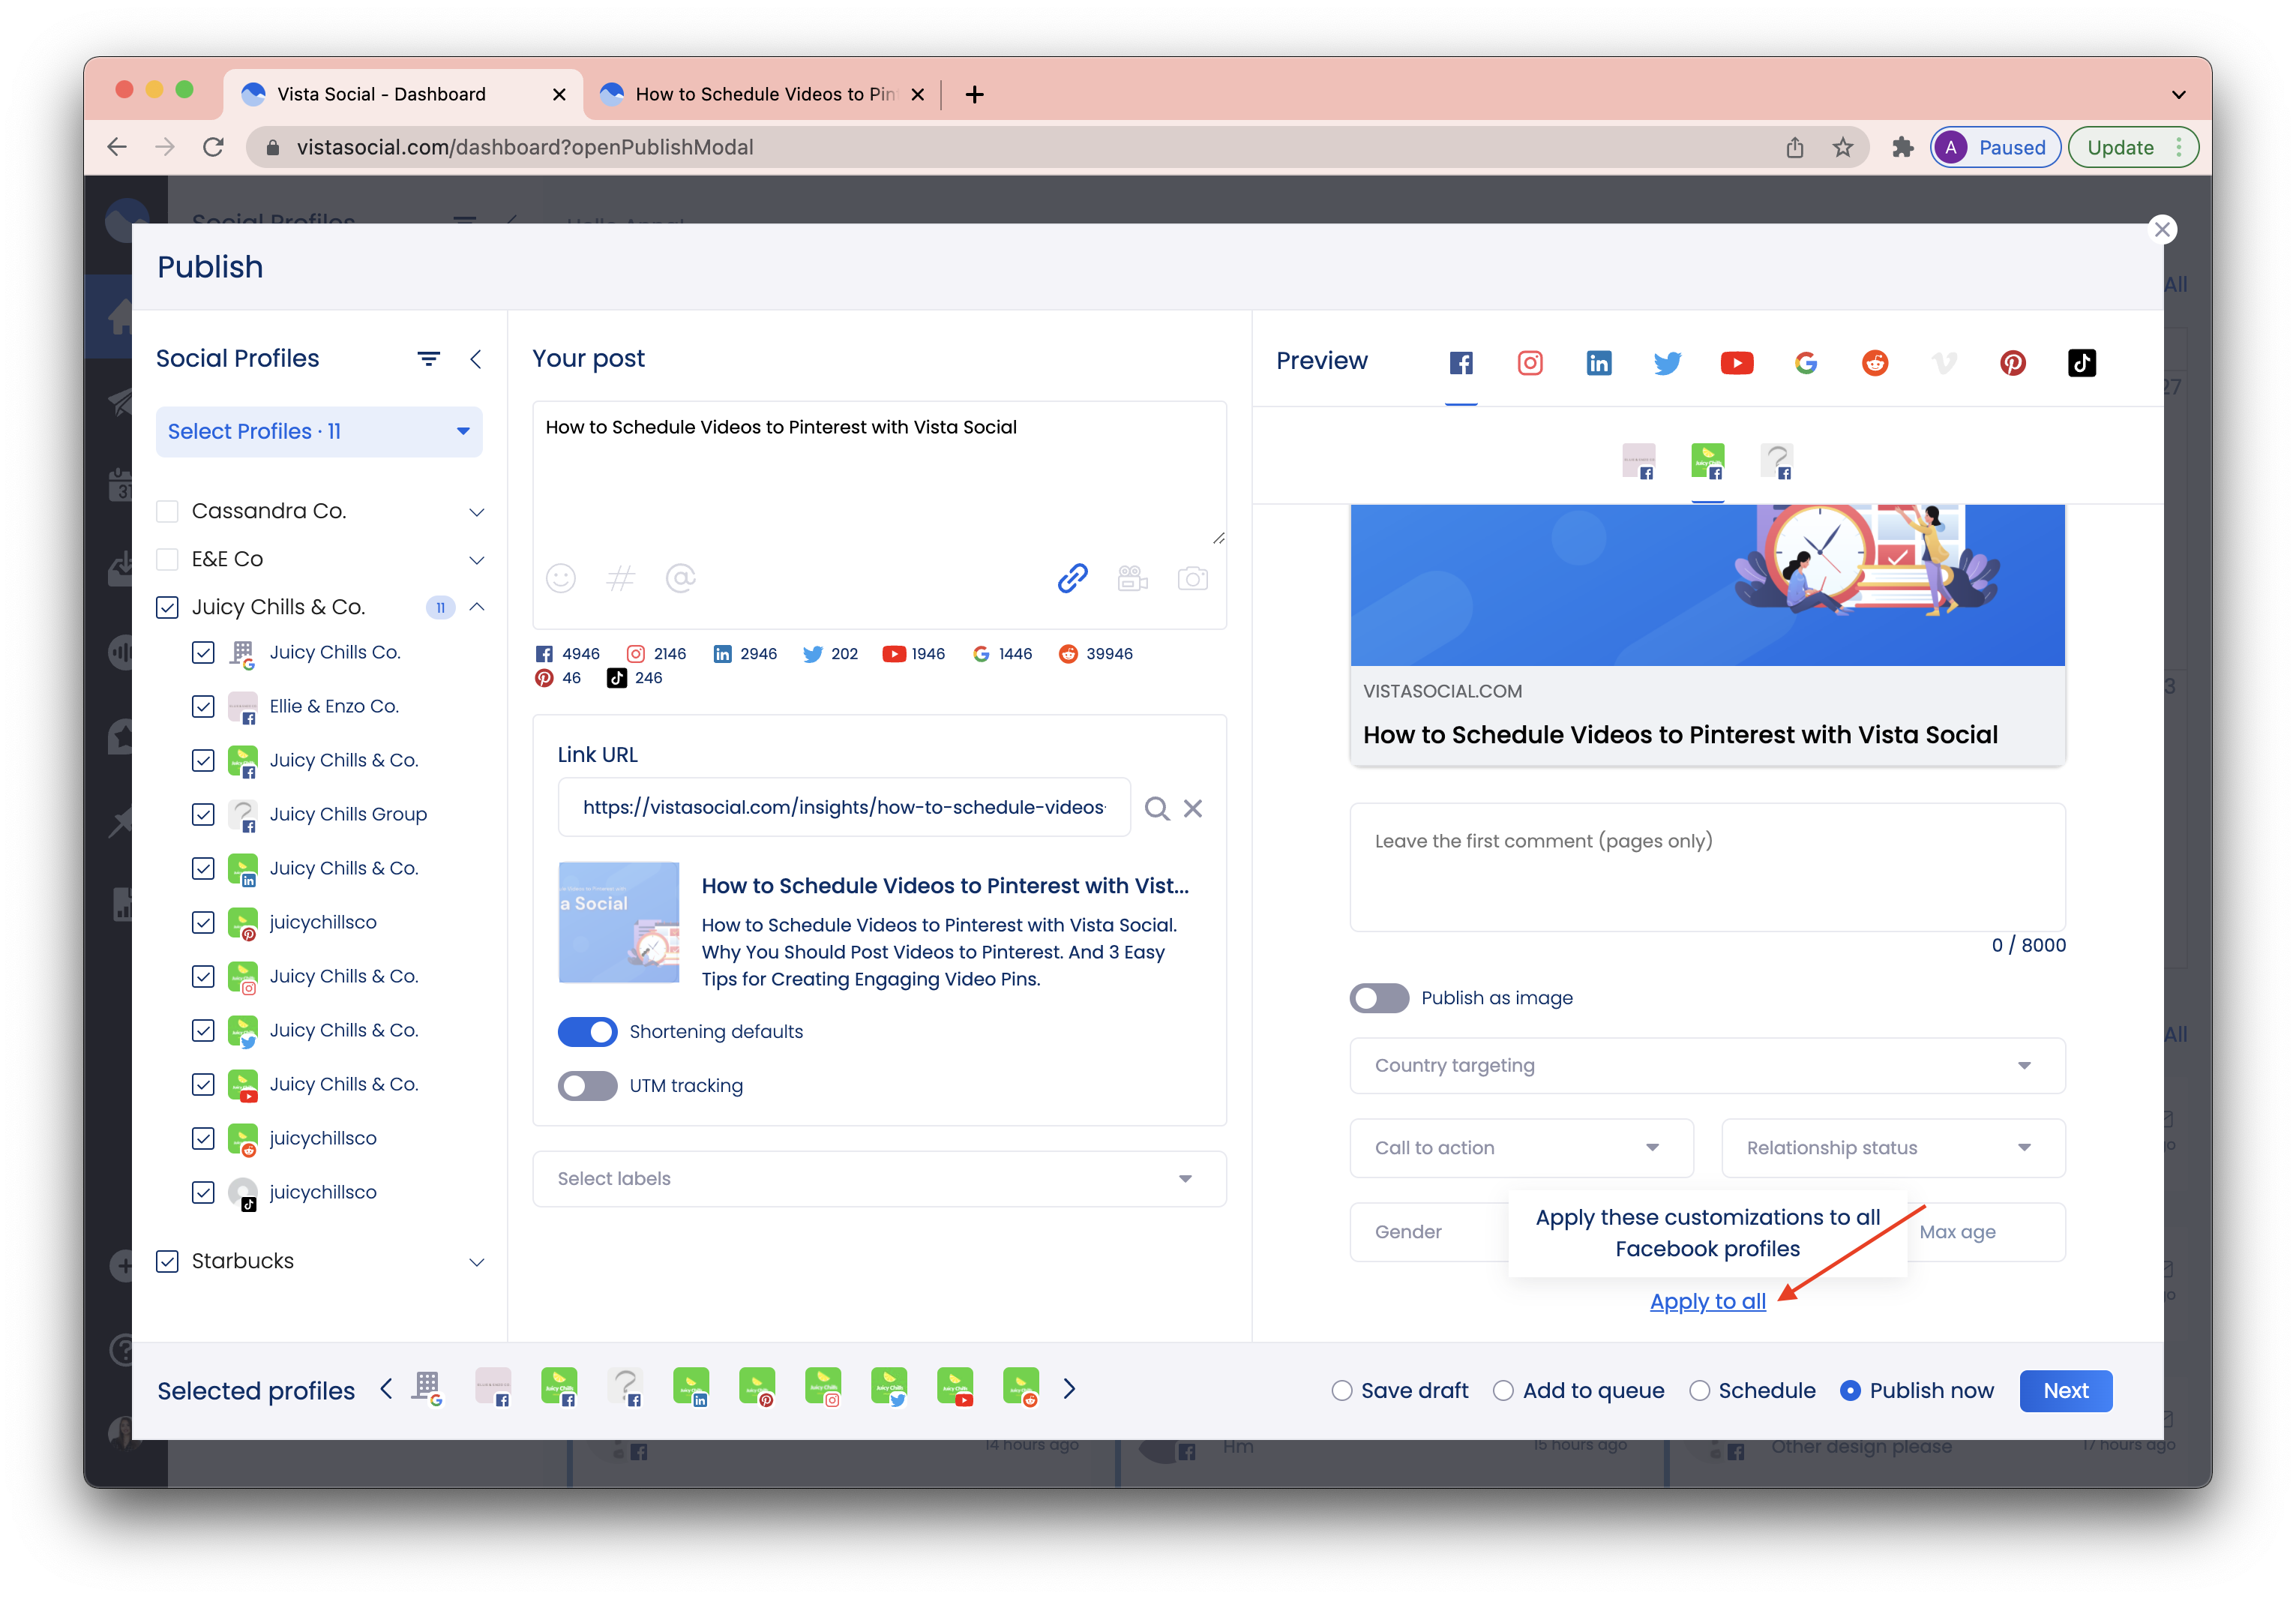
If you wish to apply the changes to all of the selected profiles in that same network, scroll down and select Apply to all.
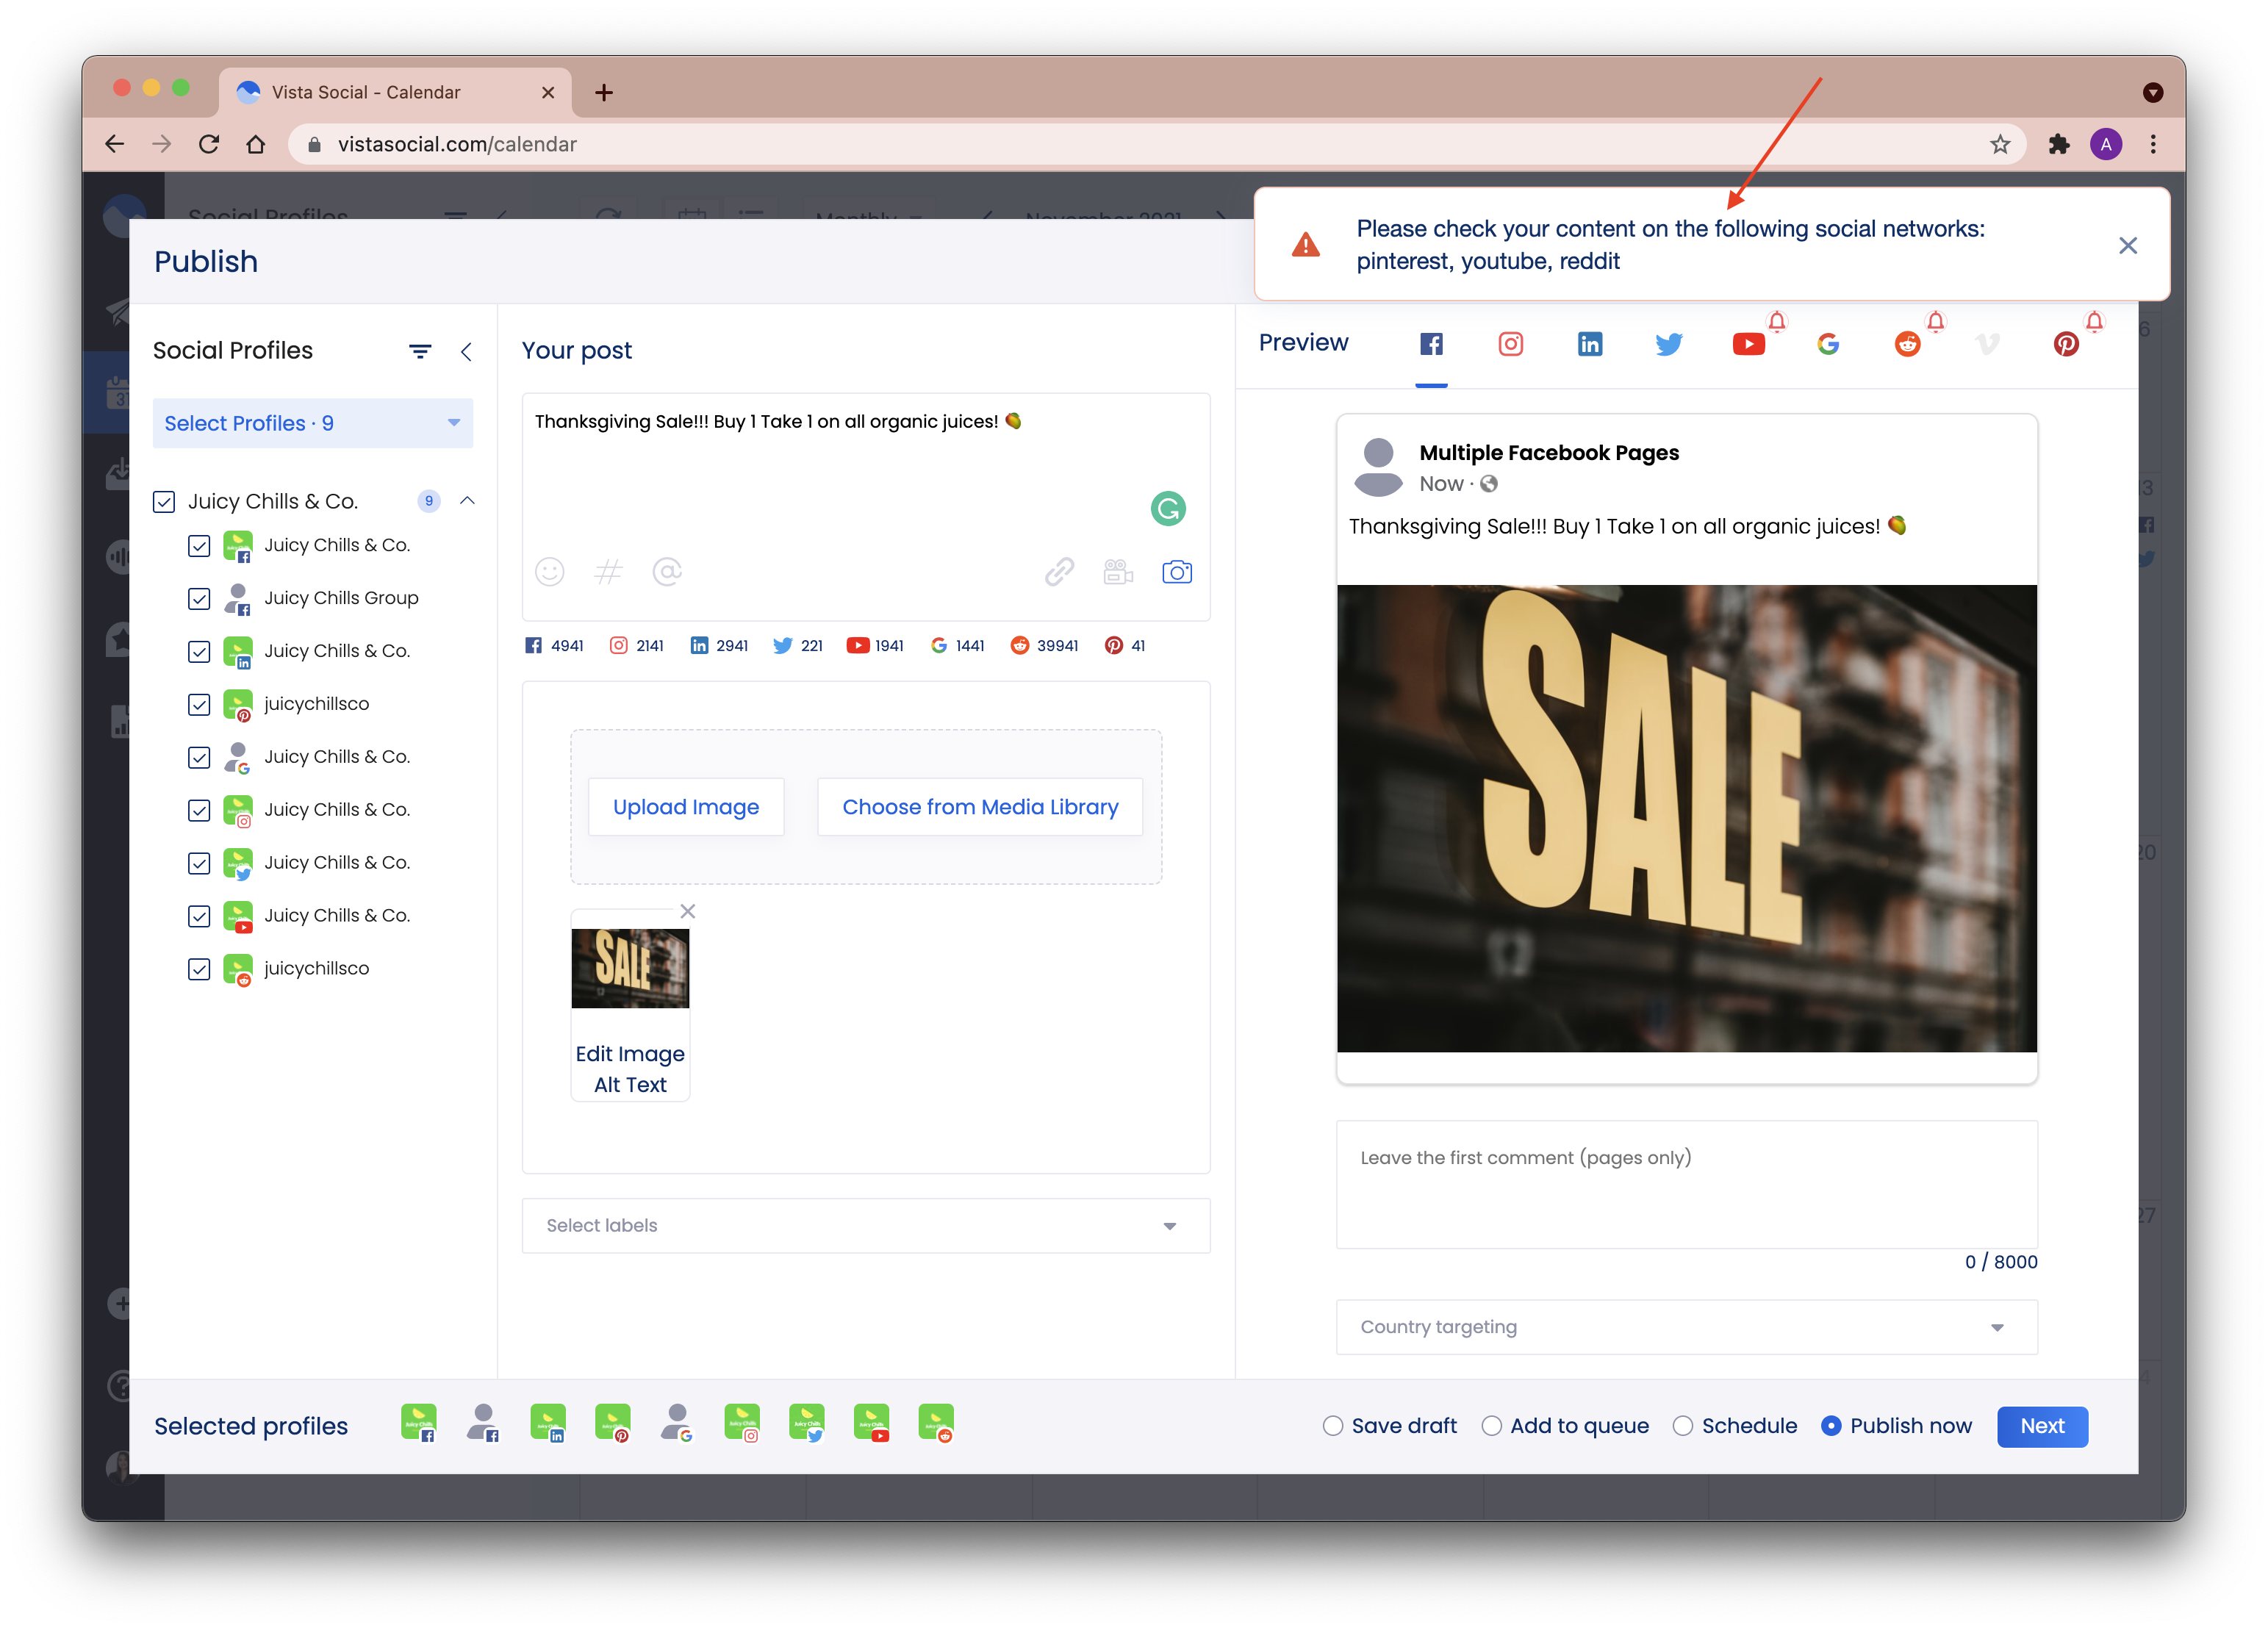
4. If you try to proceed to the next step without completing the posting requirements for certain networks, you will get a notification with a bell icon to the networks that need attention:
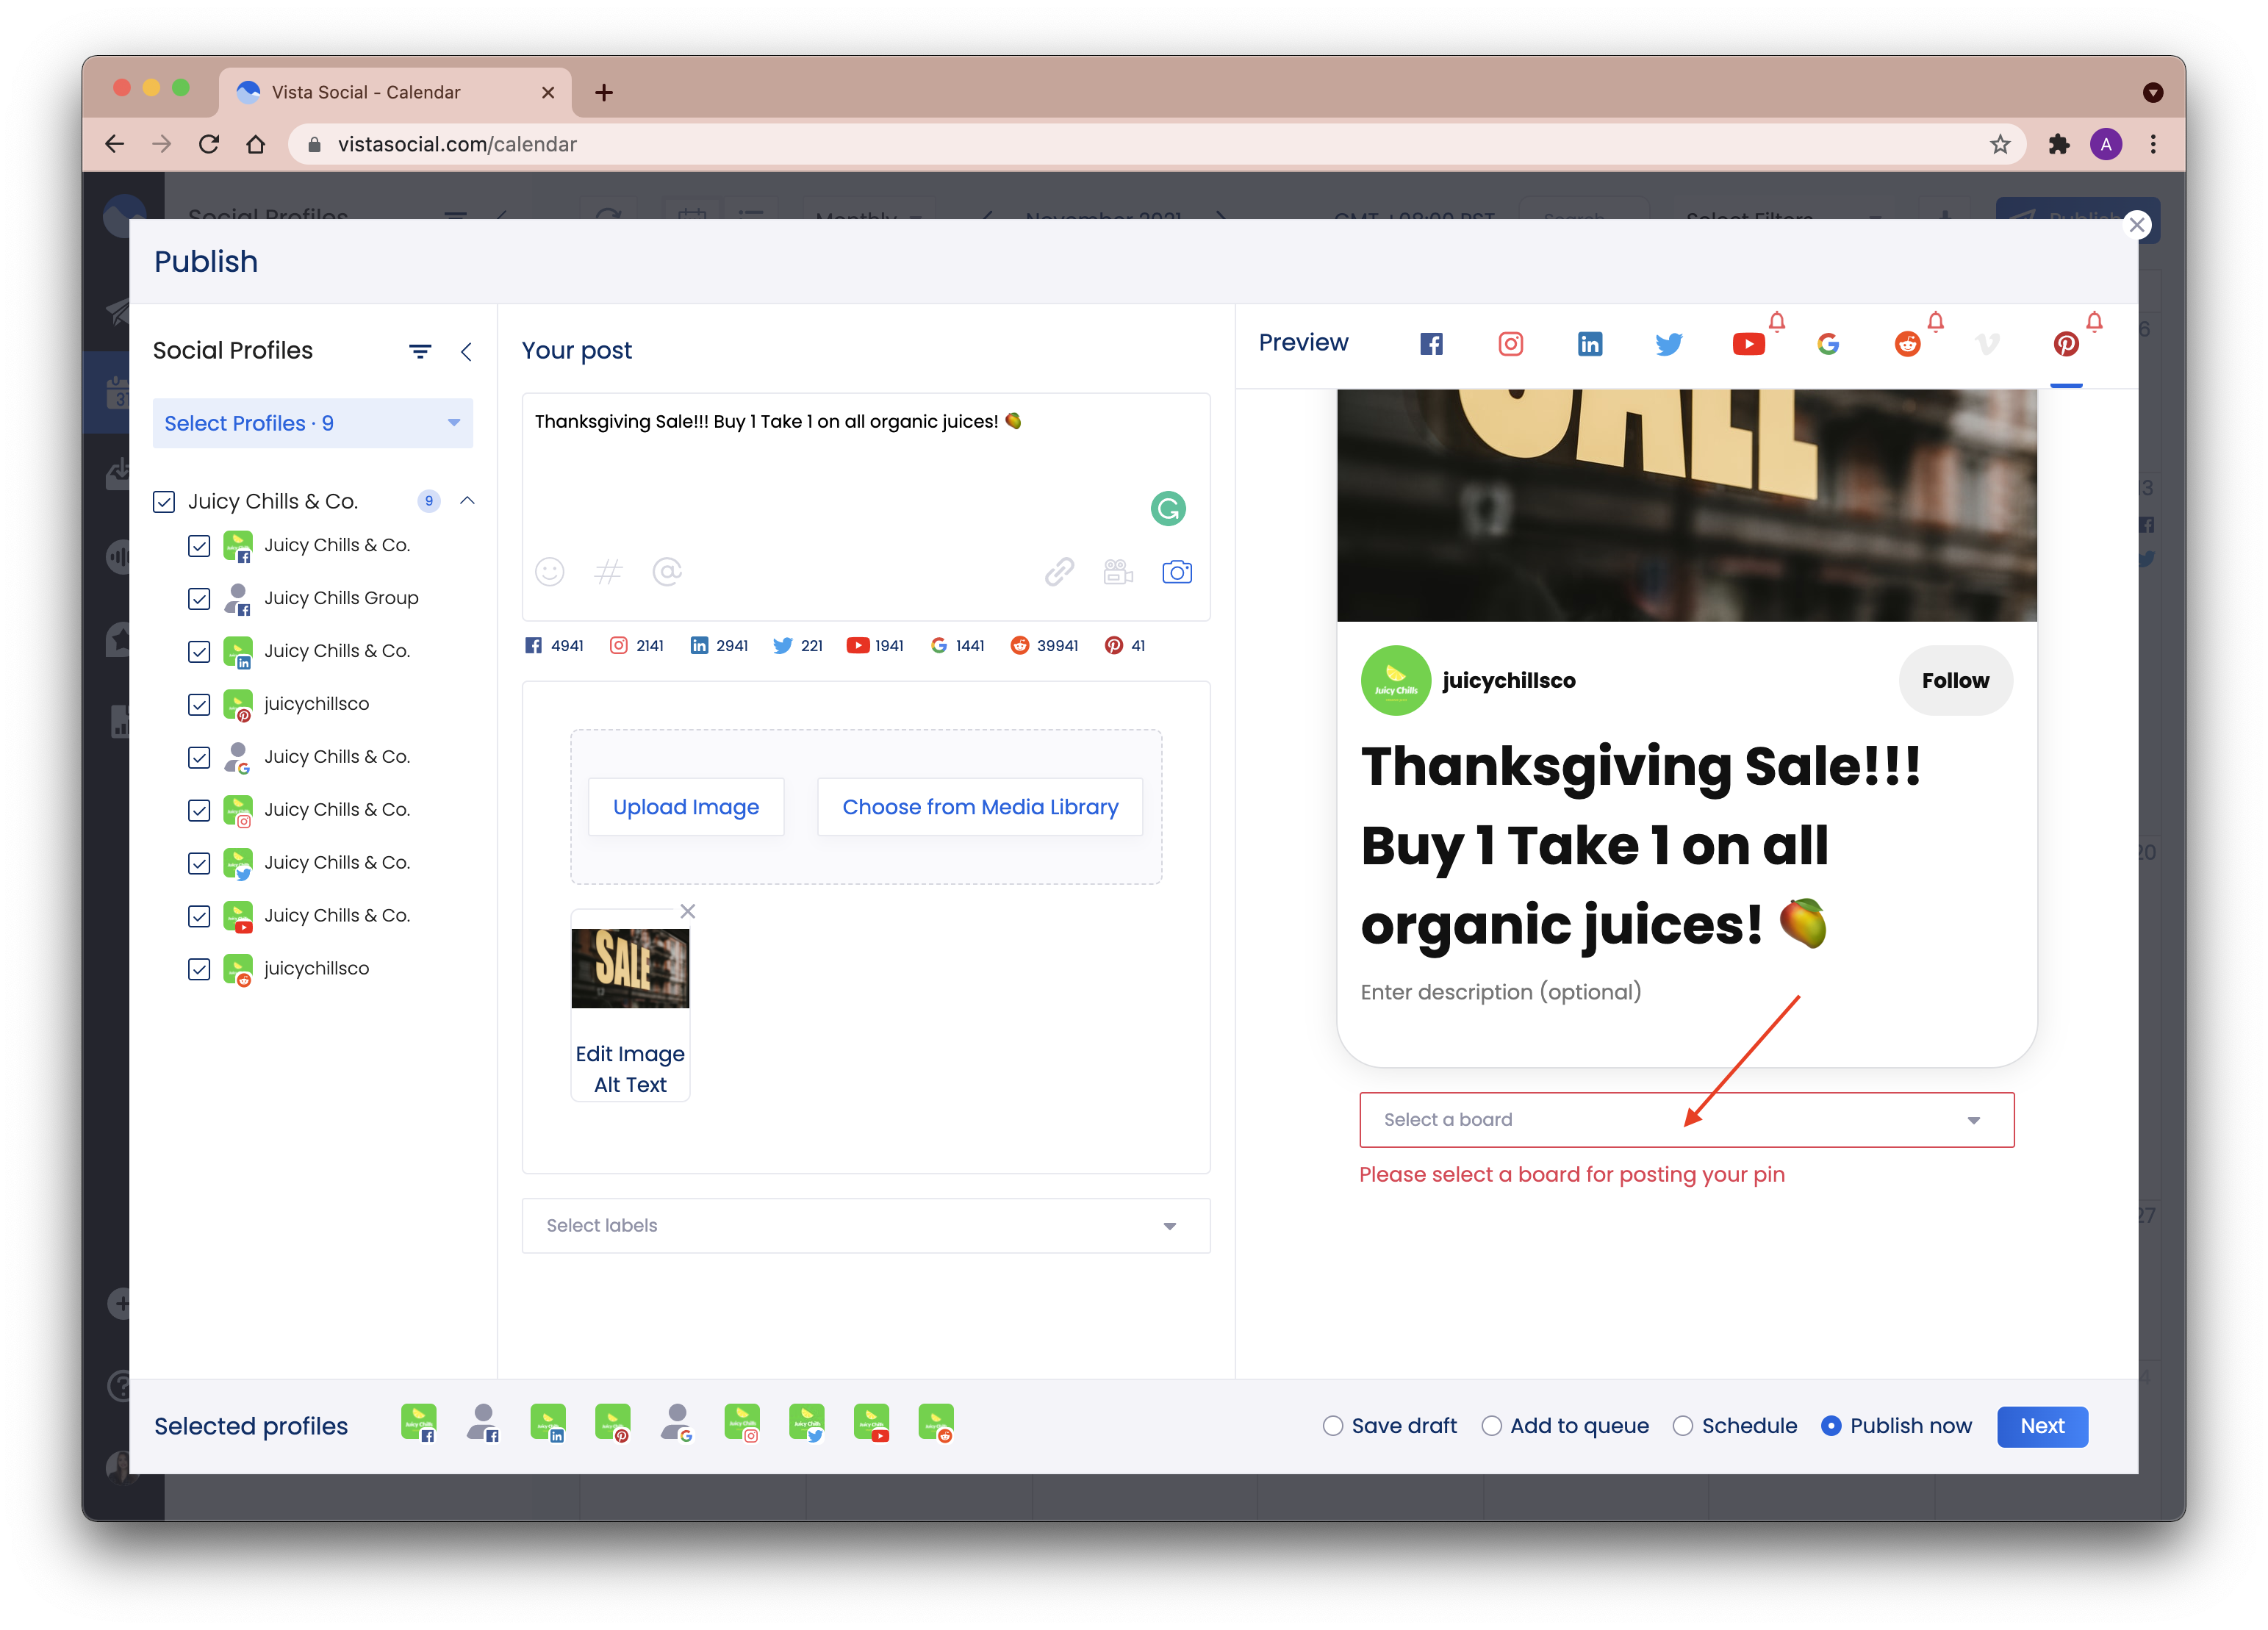
5. Click on the network that has a bell icon to get more information on what actions need to be done.
6. Choose the time when you want to publish. Click Next.
7. Click Schedule (or Publish if you are publishing immediately) to add your scheduled post to the calendar.
